
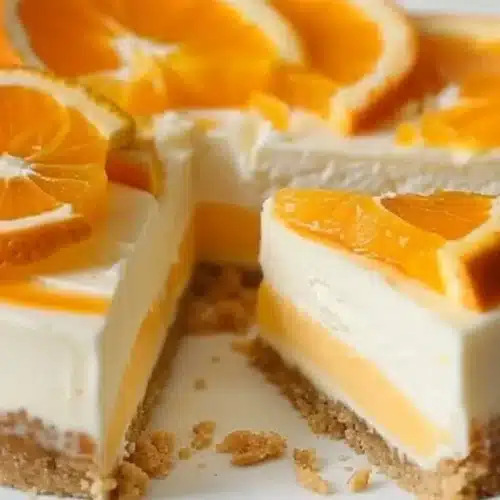
No-Bake Orange Creamsicle Cheesecake
Are you looking for a delightful summer dessert that combines creamy, tangy flavors with a hint of nostalgia? Look no further than this No-Bake Orange Creamsicle Cheesecake! This delectable treat captures the essence of a classic creamsicle, blending a luscious, velvety filling with a perfectly buttery graham cracker crust. Light, bright, and unbelievably easy to make, this cheesecake is perfect for warm-weather gatherings and casual family dinners alike. In this blog post, you’ll find everything you need to know about creating this refreshing dessert that both kids and adults will enjoy!
Why You’ll Love This No-Bake Orange Creamsicle Cheesecake
This recipe is more than just a tasty dessert—it’s a fantastic addition to your recipe repertoire for several reasons:
- Quick and Easy: No need to navigate complicated baking techniques. This no-bake cheesecake can be made in less than 30 minutes!
- Perfect for Beginners: With straightforward instructions and minimal equipment required, even novice bakers can create a show-stopping dessert.
- Ideal for the Whole Family: The nostalgic flavors of orange and cream delight adults, while kids will love the sweet and creamy taste.
- Versatile: This cheesecake is suitable for various occasions, from casual family dinners to parties and potlucks.
- No Oven Required: Keep your kitchen cool and your oven off during warm months while still creating a delightful dessert.
The Necessary Ingredients
To whip up this No-Bake Orange Creamsicle Cheesecake, you’ll need a few simple ingredients:
- 2 cups graham cracker crumbs
- 1/2 cup unsalted butter, melted
- 1 cup cream cheese, softened
- 1 cup powdered sugar
- 1 cup heavy whipping cream
- 1/2 cup orange juice
- 1 tablespoon orange zest
- 1 teaspoon vanilla extract
Notes and Substitutions on Ingredients:
- Cream Cheese: This ingredient provides the cheesecake with its creamy texture. If you’re looking for a lighter version, you may substitute it with Greek yogurt or a dairy-free cream cheese alternative.
- Graham Cracker Crumbs: The graham cracker crust adds a crunchy base. You can use crushed digestive biscuits or even Oreo crumbs for a chocolatey twist.
- Heavy Whipping Cream: This ingredient ensures a light and airy texture. If a lighter version is desired, you can replace it with a non-dairy whipped topping or coconut cream as a vegan option.
How to Prepare the No-Bake Orange Creamsicle Cheesecake Step by Step
Ready to dive into the process? Here’s your comprehensive, step-by-step guide:
-
Prepare the Crust: In a medium bowl, combine the graham cracker crumbs and melted butter until well combined. Press the mixture firmly into the bottom of a springform pan to create an even crust.
- Pro Tip: Use the flat bottom of a measuring cup to pack the crumbs tightly, ensuring a sturdy crust that holds together when sliced.
-
Mix the Cream Cheese: In a large bowl, beat the softened cream cheese and powdered sugar together until smooth and creamy. This step is essential for achieving a lump-free filling.
- Pro Tip: Make sure your cream cheese is at room temperature to ensure smooth blending without any lumps.
-
Whip the Heavy Cream: In another bowl, whip the heavy cream until stiff peaks form. This will provide structure and lightness to your cheesecake filling.
- Pro Tip: Chill your mixing bowl and beaters before whipping the cream for even better volume and stability.
-
Combine Mixtures: Gently fold the whipped cream into the cream cheese mixture until just combined. Be careful not to deflate the whipped cream too much.
- Pro Tip: Use a spatula to fold the ingredients together rather than stirring, which preserves the light and airy texture.
-
Add Flavor: Add the orange juice, orange zest, and vanilla extract to the mixture and mix until well combined.
- Pro Tip: For a stronger orange flavor, consider adding a bit more orange zest or a splash of orange extract.
-
Pour and Smooth: Pour the creamy filling over the prepared crust in the springform pan, smoothing the top with a spatula.
- Pro Tip: Tap the pan gently on the countertop to release any air bubbles that may be trapped in the filling.
-
Chill to Set: Refrigerate the cheesecake for at least 4 hours, or until fully set. This step is crucial for a sliceable cheesecake.
- Pro Tip: If you’re in a hurry, let it chill in the freezer for about an hour.
-
Serve and Enjoy: Once set, carefully remove the cheesecake from the springform pan and slice into pieces. Serve chilled, and enjoy your refreshing summer treat!
- Pro Tip: Garnish with whipped cream and orange slices for an extra touch when serving.

Serving Suggestions
Enhance your cheesecake experience with these exciting serving suggestions:
Perfect Pairings
- Beverages: Pair the cheesecake with iced tea, lemonade, or a light white wine to complement its citrusy flavors.
- Sides: Serve with a fresh fruit salad or vanilla ice cream for a delightful contrast.
Occasions
- Casual Gatherings: This cheesecake is perfect for BBQs, picnics, or any warm-weather get-togethers.
- Celebrations: Surprise your guests at birthday parties or brunches with this refreshing dessert.
Serving Tips
- Presentation: Use a spatula to neatly transfer slices to dessert plates for an appealing presentation.
- Toppings: Drizzle with chocolate sauce or add a sprinkle of crushed nuts for a textural contrast.
Storage and Reheating Tips
Proper storage will ensure your No-Bake Orange Creamsicle Cheesecake remains fresh and flavorful:
Refrigerated
- Duration: Store in the refrigerator for up to 5 days.
- Type of Container: Keep it in an airtight container or cover with plastic wrap to maintain freshness.
Frozen
- If Possible: Yes, you can freeze leftover cheesecake!
- Packaging: Wrap slices tightly in plastic wrap and place in a freezer-safe container.
- Defrosting: To enjoy thawed cheesecake, transfer it to the refrigerator for a few hours or overnight.
Reheating
- Best Method: Since this is a no-bake cheesecake, you won’t need to reheat it. Simply allow to reach room temperature for a softer enjoyability if it’s been in the refrigerator.
Guaranteed Success Tips
To ensure your cheesecake turns out perfect every time, here are some golden rules to follow:
- Use Room Temperature Ingredients: Make sure both cream cheese and butter are at room temperature for a smoother consistency.
- Don’t Overmix: Avoid overmixing the whipped cream with the cream cheese mixture to maintain airiness.
- Cool Completely: Allow the cheesecake to set fully in the fridge for the best texture.
- Consider the Zest: Be sure to grate the orange zest finely to avoid large chunks in the filling.
- Slice with Warm Water: Warm a knife in hot water before slicing to create clean edges.
Recipe Variations
Looking to mix things up? Here are a few delicious variations of the No-Bake Orange Creamsicle Cheesecake:
- Chocolate Orange Cheesecake: Swirl in 1/4 cup of melted dark chocolate into the orange cream mixture for a rich twist.
- Berry Citrus Cheesecake: Add 1 cup of mixed berries into the filling for a fruity twist and garnish with additional berries.
- Coconut Version: Substitute half of the heavy cream with coconut cream, and add shredded coconut to the crust for a tropical flair.
Frequently Asked Questions (FAQ)
-
Q: My cheesecake came out too runny; what did I do wrong?
A: This could happen if the cream wasn’t whipped to stiff peaks or if the cheesecake didn’t chill long enough to set. Make sure to chill for at least 4 hours. -
Q: Can I make this cheesecake dairy-free?
A: Yes! Use dairy-free cream cheese and coconut cream or a non-dairy whipped topping in place of heavy cream. -
Q: Can I substitute the orange juice with something else?
A: Absolutely! You can use lemon juice for a tart flavor or another citrus juice, like grapefruit or tangerine. -
Q: How can I tell when the cheesecake is fully set?
A: The cheesecake should feel firm to the touch but may still have a slight jiggle in the center when you gently shake it. -
Q: How do I prevent a soggy crust?
A: Make sure to press the graham cracker mixture firmly into the bottom of the pan, and consider briefly toasting the crumbs in the oven for extra crunch. -
Q: Can I decorate the cheesecake?
A: You can certainly add decorations! Try garnishing with whipped cream, orange slices, or even edible flowers for a beautiful presentation. -
Q: What should I do if I don’t have a springform pan?
A: You can use a regular pie dish, but be careful when slicing, as it will be more challenging to remove slices without a springform pan.
With this No-Bake Orange Creamsicle Cheesecake, you’ll delight in each creamy, zesty bite that takes you right back to sunny summer days! Enjoy making this treat and sharing it with family and friends. Happy baking (or no-baking)!
No-Bake Orange Creamsicle Cheesecake
Ingredients
For the Crust
- 2 cups graham cracker crumbs Can substitute with crushed digestive biscuits or Oreo crumbs.
- 1/2 cup unsalted butter, melted Ensure butter is at room temperature.
For the Filling
- 1 cup cream cheese, softened Can substitute with Greek yogurt or dairy-free cream cheese for a lighter version.
- 1 cup powdered sugar
- 1 cup heavy whipping cream Can replace with non-dairy whipped topping or coconut cream.
- 1/2 cup orange juice Can substitute with lemon juice or other citrus juices.
- 1 tablespoon orange zest Grate finely for better incorporation.
- 1 teaspoon vanilla extract
Instructions
Preparation
- In a medium bowl, combine the graham cracker crumbs and melted butter until well combined. Press the mixture firmly into the bottom of a springform pan to create an even crust.
- In a large bowl, beat the softened cream cheese and powdered sugar together until smooth and creamy.
- In another bowl, whip the heavy cream until stiff peaks form.
- Gently fold the whipped cream into the cream cheese mixture until just combined.
- Add the orange juice, orange zest, and vanilla extract to the mixture and mix until well combined.
- Pour the creamy filling over the prepared crust in the springform pan, smoothing the top with a spatula.
- Refrigerate the cheesecake for at least 4 hours, or until fully set.
- Once set, carefully remove the cheesecake from the springform pan and slice into pieces. Serve chilled.