
Mini Cheesecakes: A Delightful Dessert for Any Occasion
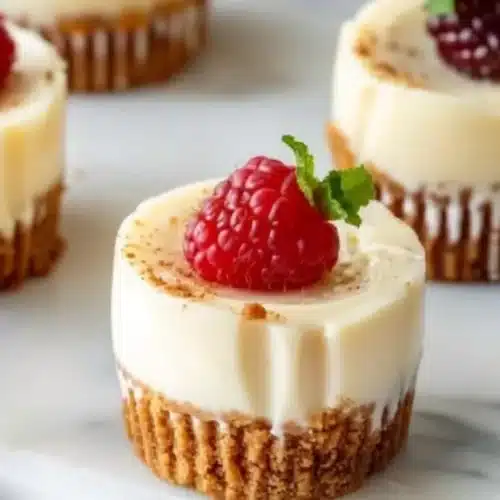
Mini cheesecakes are the perfect sweet treat that combines the richness of cream cheese with a light and fluffy texture. These bite-sized delights are wonderfully versatile; they can be topped with fresh fruit, chocolate shavings, or even enjoyed as is. Their creamy filling over a buttery graham cracker crust makes them a beloved dessert among both kids and adults alike. This isn’t just another cheesecake recipe; it’s your new go-to for a delightful, easy-to-make dessert that will impress your guests and satisfy your cravings!
Why You’ll Love This Mini Cheesecakes
If you’re looking for a dessert that is as easy to prepare as it is delicious, these mini cheesecakes are the answer. Here’s why you’ll love them:
- Quick and Easy: With minimal prep time and simple ingredients, these mini cheesecakes come together in no time.
- Perfect for Beginners: If you’re new to baking, you’ll find that this recipe is straightforward and forgiving—perfect for honing your skills!
- Ideal for the Whole Family: Everyone loves cheesecake! These mini versions are perfect for kids and adults alike.
- Customizable: You can easily customize your toppings and crust to suit personal tastes.
- Great for Any Occasion: Whether it’s a birthday, holiday, or just a sweet craving, these mini cheesecakes fit the bill.
The Necessary Ingredients
Before you begin, make sure you have the following ingredients at hand to create these scrumptious mini cheesecakes:
- 8 oz cream cheese, softened
- 1/2 cup granulated sugar
- 1 tsp vanilla extract
- 1 cup heavy cream
- 1/4 cup gluten-free graham cracker crumbs
- 2 tbsp unsalted butter, melted
- 1/4 cup powdered sugar (for topping, optional)
- Fresh fruit or chocolate shavings (for garnish, optional)
Notes and Substitutions on Ingredients:
- Cream Cheese: This is the star of the show, providing the characteristic creamy texture. If you’re looking for a lighter option, you can use Neufchâtel cheese, which has less fat but offers a similar taste.
- Heavy Cream: Whipping the cream results in a light and airy cheesecake. You can swap this for coconut cream for a dairy-free version, just chill your can of coconut milk overnight and use the solid fat.
- Gluten-Free Graham Crackers: These provide a wonderful crust texture. If gluten isn’t a concern, regular graham crackers will work perfectly too.
How to Prepare the Mini Cheesecakes Step by Step
Now that you have your ingredients ready, let’s walk through the process of making these delightful mini cheesecakes:
-
Preheat the Oven: Preheat your oven to 325°F (160°C). Greasing a muffin tin ensures that your mini cheesecakes will come out easily without sticking.
- Pro Tip: Using mini cupcake liners not only makes for easy cleanup but also adds a fun pop of color!
-
Make the Crust: In a mixing bowl, combine the gluten-free graham cracker crumbs and melted butter. Press this mixture into the bottom of each muffin cup to form the crust.
- Pro Tip: Use the bottom of a shot glass or a small cup to press down firmly and create an even layer.
-
Prepare the Cheesecake Filling: In another bowl, beat the softened cream cheese until smooth. Gradually add in the granulated sugar and vanilla extract, mixing until the mixture is well combined.
- Pro Tip: Make sure the cream cheese is at room temperature for easier mixing and a smoother texture.
-
Whip the Heavy Cream: In a separate bowl, whip the heavy cream until you achieve stiff peaks. This will help create a light and fluffy filling.
- Pro Tip: To achieve the best peaks, ensure your mixing bowl and beaters are clean and chilled.
-
Combine the Mixtures: Gently fold the whipped cream into the cream cheese mixture until fully incorporated. Be careful not to deflate the whipped cream.
- Pro Tip: Use a spatula in a folding motion to retain as much air as possible.
-
Fill the Muffin Cups: Pour the cheesecake filling over the crusts, filling each cup about 3/4 full. This allows room for the cheesecakes to puff slightly as they bake.
- Pro Tip: Use a piping bag for a neat and mess-free filling process.
-
Bake and Cool: Bake for 15-20 minutes until set. The cheesecakes should be firm but may jiggle slightly in the center. Remove from the oven, let cool to room temperature, then refrigerate for at least 2 hours before serving.
- Pro Tip: Cooling them in the fridge overnight intensifies their flavor and improves texture!

Serving Suggestions
These mini cheesecakes don’t just taste great; they can be dressed up in numerous ways. Here are some serving suggestions:
Perfect Pairings
- Beverages: A cup of freshly brewed coffee or a refreshing iced tea perfectly complements the creamy texture of the cheesecakes.
- Sides: Pair them with a light fruit salad for a refreshing contrast to the rich cheesecake.
Occasions
- Weeknight Dinner: Spruce up your casual dinners with these mini treats—they’re easy to whip up and offer a sweet ending to any meal.
- Special Occasion: Perfect for birthdays or holiday gatherings, these cheesecakes can be dressed up with vibrant toppings and elegant garnishes.
Serving Tips
- Plating: Serve on a beautiful decorative plate and dust with powdered sugar for a professional touch.
- Garnishes: Top each cheesecake with a slice of fresh fruit or shavings of chocolate to enhance presentation and taste.
Storage and Reheating Tips
To keep your mini cheesecakes fresh, here’s how to store them:
Refrigerated
- Duration: They will stay fresh in the fridge for up to 5 days.
- Type of Container: Store them in an airtight container or cover with plastic wrap to prevent drying.
Freezed
- If Possible: Yes, you can freeze mini cheesecakes, but it’s best to do so without any toppings.
- Packaging: Wrap each cheesecake individually in plastic wrap and then place them in a freezer-safe container. They’ll keep for up to 2 months.
- Defrosting: To defrost, place them in the fridge overnight or let them sit at room temperature for about 30 minutes before serving.
Reheating
- Best Method: These cheesecakes are best served cold or at room temperature. Just take them out of the fridge and enjoy!
Guaranteed Success Tips
To ensure your mini cheesecakes turn out perfectly every time, follow these golden rules:
- Don’t Overmix the Batter: Just mix enough to incorporate the whipped cream into the cheesecake batter; overmixing can deflate the whipped cream.
- Use Room Temperature Ingredients: Cold cream cheese takes longer to mix and can result in a lumpy texture.
- Monitor Baking Time: Every oven is different, so keep an eye on the cheesecakes towards the end of baking. They should be just set in the center.
- Chill Before Serving: Allowing time in the fridge enhances flavors and gives them the best texture.
Recipe Variations
Want to get creative? Here are some exciting variations you can try:
- For a fruity version: Add 1/2 cup of pureed strawberries or blueberries into the cheesecake mixture before baking for a burst of flavor.
- For a chocolate twist: Melt 1/2 cup of chocolate chips and fold them into the cheesecake filling for a delicious chocolate variation.
- For a pumpkin spice version: Add 1/2 cup of pumpkin puree along with some pumpkin spice (1 tsp) for a perfect fall dessert.
Frequently Asked Questions (FAQ)
Q: My cheesecake came out completely dry, what did I do wrong?
A: Overbaking is the most common culprit. Mini cheesecakes should jiggle slightly in the center when you take them out of the oven. Remember to refrigerate them afterward to allow them to set properly.
Q: Can I use low-fat cream cheese for this recipe?
A: Yes! Low-fat cream cheese can be used, but it might affect the texture slightly. The cheesecake may not be as rich and creamy.
Q: How can I tell when the mini cheesecakes are done baking?
A: The edges should be set, while the center remains slightly jiggly. The cheesecakes will firm up as they cool.
Q: How should I garnish my mini cheesecakes?
A: Choose fresh fruits, chocolate shavings, or a sprinkle of powdered sugar. You can even drizzle some caramel or chocolate sauce for extra flair!
Q: Can I make the cheesecakes in advance?
A: Absolutely! They can be made a day ahead and stored in the fridge until you’re ready to serve.
Q: What’s the best way to remove the cheesecakes from the muffin tin?
A: If using liners, simply peel them off. If not, use a butter knife around the edges to gently lift them out.
Q: Can I use regular graham crackers instead of gluten-free?
A: Yes! If gluten is not an issue, regular graham crackers work perfectly for the crust.
Making mini cheesecakes is not only simple; it’s also a fun way to indulge your sweet tooth or impress your guests. Enjoy this recipe, and don’t hesitate to experiment with your toppings and variations. Happy baking!
Mini Cheesecakes
Ingredients
For the crust
- 1/4 cup gluten-free graham cracker crumbs Regular graham crackers can be used if gluten isn't a concern.
- 2 tbsp unsalted butter, melted
For the filling
- 8 oz cream cheese, softened Neufchâtel cheese can be used for a lighter option.
- 1/2 cup granulated sugar
- 1 tsp vanilla extract
- 1 cup heavy cream Coconut cream can be used for a dairy-free version.
For the topping (optional)
- 1/4 cup powdered sugar For topping.
- Fresh fruit or chocolate shavings For garnish.
Instructions
Preparation
- Preheat your oven to 325°F (160°C) and grease a muffin tin.
- In a mixing bowl, combine the gluten-free graham cracker crumbs and melted butter. Press this mixture into the bottom of each muffin cup to form the crust.
- In another bowl, beat the softened cream cheese until smooth. Gradually add in the granulated sugar and vanilla extract, mixing until well combined.
- In a separate bowl, whip the heavy cream until stiff peaks form.
- Gently fold the whipped cream into the cream cheese mixture until fully incorporated.
- Pour the cheesecake filling over the crusts, filling each cup about 3/4 full.
Baking
- Bake for 15-20 minutes until set. Let cool to room temperature, then refrigerate for at least 2 hours before serving.