
Amish White Bread: A Simple, Heartwarming Recipe
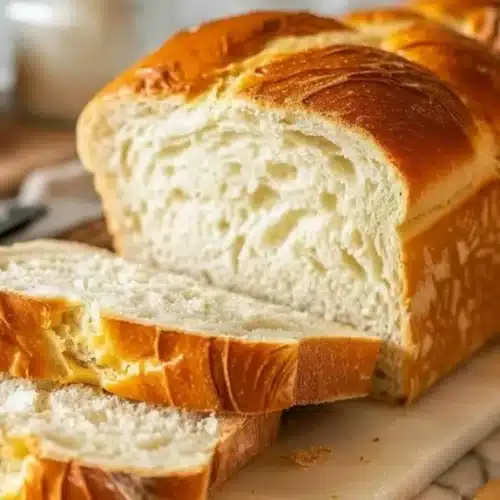
Imagine coming home to the comforting aroma of freshly baked bread, filling your kitchen with a warmth and nostalgia that brings back fond memories. Amish White Bread is not just any bread; it’s a fluffy, slightly sweet loaf that’s perfect for sandwiches, toast, or simply enjoying fresh out of the oven with butter. This recipe is special because it is straightforward, forgiving, and yields a consistently delicious result that will wow your family and friends. Get ready to roll up your sleeves and create your new favorite bread!
Why You’ll Love This Amish White Bread
This Amish White Bread recipe has something for everyone. Whether you’re a novice baker or a seasoned pro, you’ll find joy in the process and delight in the results. Here’s why you’ll adore this recipe:
- Quick and Easy: With minimal ingredients and clear steps, you can whip up a batch in no time.
- Perfect for Beginners: If you’re new to baking, this straightforward recipe will give you the confidence to create bread from scratch.
- Ideal for the Whole Family: Kids and adults alike will love the light, fluffy texture and the subtly sweet flavor.
- Economical: With only a few inexpensive ingredients, making your bread at home is cost-effective compared to store-bought options.
- Versatile: This white bread serves as a perfect base for various toppings, sauces, or fillings, making it ideal for any meal.
The Necessary Ingredients
Before we dive into the preparation, it’s essential to gather all the ingredients you’ll need. Here’s what you’ll be using:
- 4 cups all-purpose flour
- 2 tablespoons sugar
- 1 tablespoon salt
- 2 teaspoons active dry yeast
- 1 1/2 cups warm water
- 2 tablespoons vegetable oil
Notes and Substitutions on Ingredients
-
All-Purpose Flour: This versatile flour is perfect for creating a soft and fluffy bread. If you’re looking for a different option, you can use bread flour, which will create a chewier texture due to its higher protein content.
-
Sugar: This not only provides sweetness but also helps feed the yeast, enhancing the rise of your bread. If you’re aiming for a lower sugar option, honey can be used, though adjustments to moisture content may be necessary.
-
Active Dry Yeast: It’s crucial to use fresh yeast for optimal rise. You can substitute this with instant yeast, but skip the proofing step as instant yeast can be mixed directly with the dry ingredients.
How to Prepare the Amish White Bread Step by Step
Now that you’ve gathered your ingredients, let’s start making that delicious Amish White Bread! Follow these easy steps:
-
Combine Warm Water, Sugar, and Yeast: In a large bowl, mix the warm water with sugar and sprinkle the yeast on top. Let this sit for about 5 minutes until it becomes frothy.
- Pro Tip: Make sure the water temperature is between 100°F to 110°F. Too hot will kill the yeast, while too cold will hinder its activation.
-
Add Oil and Salt: Once the yeast mixture is frothy, add the vegetable oil and salt, stirring gently to combine.
- Pro Tip: Adding oil will help in creating a moist texture in your bread, while salt balances the flavors and strengthens the dough.
-
Mix in the Flour: Gradually add the flour, one cup at a time, mixing until a soft dough forms.
- Pro Tip: Avoid adding too much flour at once; this prevents a dry loaf. If needed, adjust by adding a little more warm water to the mixture to achieve the right consistency.
-
Knead the Dough: Turn the dough out onto a floured surface and knead for about 8-10 minutes until smooth and elastic.
- Pro Tip: You’ll know the dough is ready when it springs back when poked gently. This indicates proper gluten development.
-
Let the Dough Rise: Place the kneaded dough in a greased bowl, cover it with a clean towel, and allow it to rise in a warm place for about 1 hour or until it has doubled in size.
- Pro Tip: You can create a warm environment for the dough by preheating your oven for just a few minutes, then turning it off and placing the covered dough inside.
-
Shape the Loaves: Once risen, punch down the dough to release excess air. Shape it into loaves by stretching the dough and tucking the edges underneath.
- Pro Tip: Make sure to shape it gently to maintain some of the air bubbles that will help create a light texture.
-
Second Rise: Place the shaped loaves in greased bread pans and let them rise again for about 30 minutes until puffy.
- Pro Tip: If you’re in a cooler environment, try placing the bread on top of a warm stove or near a warm window to help it rise.
-
Preheat the Oven: Preheat your oven to 350°F (175°C) while the dough is undergoing its second rise.
- Pro Tip: Ensuring your oven is preheated will help create a better crust on your bread when it starts baking.
-
Bake the Bread: Bake the loaves for 30-35 minutes or until they are golden brown on top and sound hollow when tapped.
- Pro Tip: If the tops brown too quickly, cover them lightly with foil for the last few minutes of baking.
-
Cool Before Slicing: Once baked, remove the bread from the pans and allow them to cool on a wire rack before slicing.
- Pro Tip: Letting the bread cool completely will give it a better texture and prevent squishing when you slice.

Serving Suggestions
Now that your delicious Amish White Bread is ready, here are some creative ways to enjoy it:
Perfect Pairings
- Drinks: A piping hot cup of tea or coffee pairs wonderfully with freshly baked bread.
- Sides: Serve with a warm bowl of soup or a hearty salad for a complete meal.
Occasions
- Weeknight Dinner: Make it a staple alongside your family dinners; it’s perfect for mopping up sauces and gravies.
- Special Occasions: Impress guests at brunch or holiday gatherings by serving it with various spreads such as jams, butter, or even a baked brie.
Serving Tips
- Toast It: Lightly toasting slices creates a delightful crunch; top with smashed avocado or your favorite nut butter for a delicious breakfast or snack.
- Make Sandwiches: Use it to create hearty sandwiches, whether it’s classic PB&J or a more gourmet turkey club.
Storage and Reheating Tips
To keep your bread fresh and delicious for as long as possible, follow these guidelines:
Refrigerated
- Duration: Store in an airtight container for up to 3-5 days.
- Type of Container: Use a plastic bag or a bread box to prevent it from drying out.
Frozen
- If Possible: Yes, this bread freezes beautifully!
- Packaging: Wrap slices or whole loaves tightly in plastic wrap, then place in a freezer bag.
- Defrosting: To thaw, leave in the fridge overnight or allow to come to room temperature. You can also pop slices in the toaster directly from the freezer.
Reheating
- Best Method: For best results, reheat slices in a toaster for a few minutes or warm whole loaves in a 350°F (175°C) oven for about 10-15 minutes.
Guaranteed Success Tips
Here are some helpful golden rules to keep in mind for perfect Amish White Bread:
- Don’t Overmix the Dough: Mix just enough to combine the ingredients fully to prevent a tough texture.
- Measure Flour Accurately: Spoon and level your flour rather than scooping directly from the bag to avoid adding too much.
- Watch Your Yeast: Always check the expiration date on your yeast before using it to ensure it’s active and alive.
- Keep an Eye on the Oven: Every oven is different, so know your baking oven’s quirks to avoid overbaking or underbaking.
- Be Patient: Allow the dough sufficient time to rise — good bread takes time, but it is well worth the wait!
Recipe Variations
Here are a few fun twists you can make to your Amish White Bread:
- Herb-Infused: Add 1 tablespoon of dried herbs (like rosemary or thyme) when mixing in the flour for an aromatic and flavorful bread.
- Whole Wheat Mix: Substitute half of the all-purpose flour with whole wheat flour for a nuttier flavor and added fiber.
- Cinnamon Raisin: Add 1 tablespoon of cinnamon and 1 cup of raisins during the flour mixing stage for a sweet breakfast treat.
Frequently Asked Questions (FAQ)
Q: My bread didn’t rise; what went wrong?
A: The most common reasons are inactive yeast or not keeping the dough warm enough. Always check your yeast’s expiration date, and ensure you have a warm environment for rising.
Q: Can I make this bread without a stand mixer?
A: Absolutely! You can easily mix and knead the dough by hand. Just be sure to knead it for a bit longer (10-12 minutes) for proper gluten development.
Q: Is it normal for my bread to have a dense texture?
A: Yes, this can happen if there wasn’t enough kneading or if the dough didn’t rise adequately. Make sure to knead until smooth and elastic and allow ample time for rising.
Q: How do I store leftover bread?
A: Store it in an airtight container at room temperature for up to a week, or freeze it for longer storage as described above.
Q: Can I add ingredients like cheese or nuts?
A: Yes, feel free to experiment! Just fold in any additions gently during the kneading stage.
Q: How do I know when my bread is done baking?
A: The loaf should be golden brown, and when you tap it on the bottom, it should sound hollow. An internal temperature of about 190°F (88°C) is ideal.
Q: Can this recipe be halved?
A: Certainly! You can easily halve the ingredients for smaller batches, just adjust the baking time if you’re using smaller pans.
Enjoy baking and savoring your homemade Amish White Bread, a comforting touch of tradition right in your kitchen!
Amish White Bread
Ingredients
Bread Ingredients
- 4 cups all-purpose flour Versatile flour perfect for soft, fluffy bread. Can substitute with bread flour for a chewier texture.
- 2 tablespoons sugar Provides sweetness and helps feed the yeast.
- 1 tablespoon salt Balances flavors and strengthens dough.
- 2 teaspoons active dry yeast Fresh yeast ensures optimal rise; can substitute with instant yeast.
- 1.5 cups warm water Temperature should be between 100°F to 110°F.
- 2 tablespoons vegetable oil Creates a moist texture.
Instructions
Preparation
- In a large bowl, mix the warm water with sugar and sprinkle the yeast on top. Let this sit for about 5 minutes until it becomes frothy.
- Once the yeast mixture is frothy, add the vegetable oil and salt, stirring gently to combine.
- Gradually add the flour, one cup at a time, mixing until a soft dough forms.
- Turn the dough out onto a floured surface and knead for about 8-10 minutes until smooth and elastic.
- Place the kneaded dough in a greased bowl, cover it with a clean towel, and allow it to rise in a warm place for about 1 hour or until it has doubled in size.
- Once risen, punch down the dough to release excess air. Shape it into loaves by stretching the dough and tucking the edges underneath.
- Place the shaped loaves in greased bread pans and let them rise again for about 30 minutes until puffy.
- Preheat your oven to 350°F (175°C) while the dough is undergoing its second rise.
- Bake the loaves for 30-35 minutes or until they are golden brown on top and sound hollow when tapped.
- Once baked, remove the bread from the pans and allow them to cool on a wire rack before slicing.